ICONS是可以直接使用图片名, 就能加载图片的三方,使用很方便, 你不需要在工程文件夹里塞各种图片, 节省很多空间,下面就来看看怎么使用吧!
- 首先打开terminal进入到我们的工程文件夹下, (不会创建工程的请参考:http://blog.csdn.net/margaret_mo/article/details/51304062)
输入: npm install react-native-vector-icons –save (回车)
输入: npm install rnpm -g
输入: rnpm link (回车) - 在Finder中用Xcode打开工程: …/Demo/ios/Demo.xcodeproj
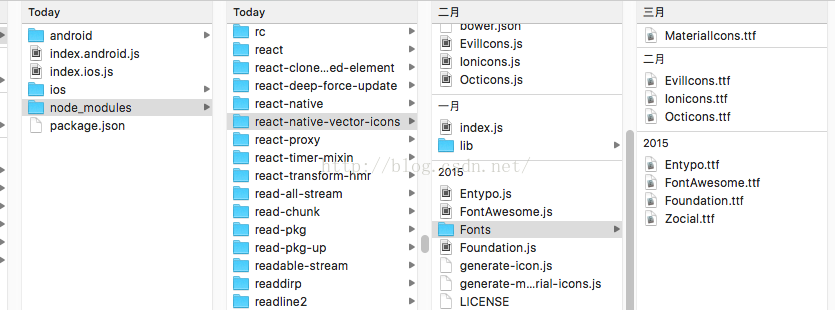
(1).右键工程文件Add Files to “(你工程名)”
(2).选择node_modules/react-native-vector-icons/Fonts文件
(3).点击”完成”.
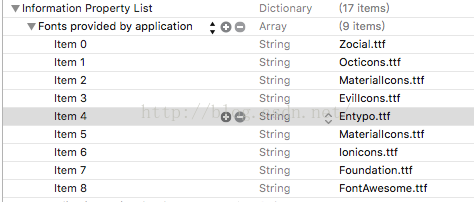
- 在xcode的Info.plist文件中,加入: Fonts provided by application数组,并加入以下9项:
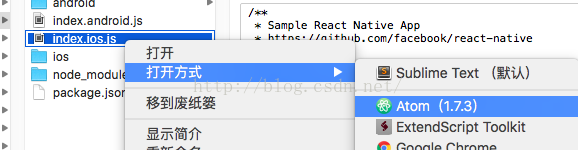
到此环境就算设置好了, 接下来就是使用ICONS了. 在Finder中右键用Atom打开工程:
5.然后就开始编辑我们的程序了:‘use strict’;
import React, {
AppRegistry,
Component,
View,
StyleSheet,
AlertIOS,
Text,
TabBarIOS,
NavigatorIOS,
} from ‘react-native’;var Icon = require(‘react-native-vector-icons/FontAwesome’);
import FindComponent from ‘./FindComponent’;
import SearchComponent from ‘./SearchComponent’;
class Demo extends Component {

  state = {
    selectedTab: 'find',
  };

  loginWithFacebook = () => {   //点击"Login with Facebook"按钮后触发的方法
    AlertIOS.alert("facebook");
  }

  render() {
    return (
      <View style={styles.container}>
        <Icon
          name="rocket"   //图片名连接,可以到这个网址搜索:http://ionicons.com/, 使用时:去掉前面的 "icon-" !!!!
          size={30}   //图片大小
          color="red"  //图片颜色
          />

    <Icon.Button    //在图片后加文字
      name="facebook"
      backgroundColor="#3b5998"
      onPress={this.loginWithFacebook} //点击该按钮后触发的方法
      >
      Login with Facebook
    </Icon.Button>

    <Icon.Button  //在图片后加, 自定义样式的文字
      name="facebook"
      backgroundColor="#3b5998">
      <Text style={{fontFamily: 'Arial', fontSize: 15}}>Login with Facebook</Text>
    </Icon.Button>


    <TabBarIOS    //和标签视图一起使用
     tintColor="#4977f0"
     barTintColor="#E6E6E6">

     <Icon.TabBarItem  //用 Icon.TabBarItem 代替 TabBarIOS.Item
       title="发现"
       iconName="home"
       selectedIconName="home"
       selected = {this.state.selectedTab === 'find'}
       onPress={() => {
         this.setState({
           selectedTab: 'find',
         });
       }}>
       <NavigatorIOS    //导航栏
         style={styles.container}
         tintColor='#FFFFFF'
         barTintColor='#4977f0'
         initialRoute={{
               title: "发现",
               titleTextColor: 'white',
               component: FindComponent
             }}/>
     </Icon.TabBarItem>

     <Icon.TabBarItem  //用 Icon.TabBarItem 代替 TabBarIOS.Item
       title="搜索"
       iconName="search"
       selectedIconName="search"
       selected = {this.state.selectedTab === 'search'}
       onPress={() => {
         this.setState({
           selectedTab: 'search',
         });
       }}>
       <NavigatorIOS
         style={styles.container}
         tintColor='#FFFFFF'
         barTintColor='#4977f0'
         initialRoute={{
               title: "搜索",
               titleTextColor: 'white',
               component: SearchComponent
             }}/>
     </Icon.TabBarItem>
   </TabBarIOS>

  </View>
);
  }
}

const styles = StyleSheet.create({
  container: {
    flex: 1,
    justifyContent: 'center',
  },
});

AppRegistry.registerComponent('Demo', () => Demo);
在terminal中的工程文件夹下,输入react-native run-ios(回车)等待程序运行起来就能看到效果啦.
主要代码下载地址: http://download.csdn.net/detail/margaret_mo/9512769
参考网站: https://github.com/oblador/react-native-vector-icons
转自:http://www.cnblogs.com/moxiaoyan33/p/5482024.html